
Complete guide
How to apply nasal strips.
A step-by-step guide to applying nasal strips correctly — where to put them, how to use them for snoring and breathing, and how to apply Breathe Right, magnetic and RhinoGear nose strips. Six illustrated steps, plus a placement diagram.
Quick note: this guide is for breathing nasal strips — the spring-band strip that sits on top of the nose to open your nasal valve for snoring and breathing. It's not the same as pore strips (Biore, charcoal nose strips) which are skincare products designed to pull out blackheads. Different product, different application, different purpose.
Nasal strips
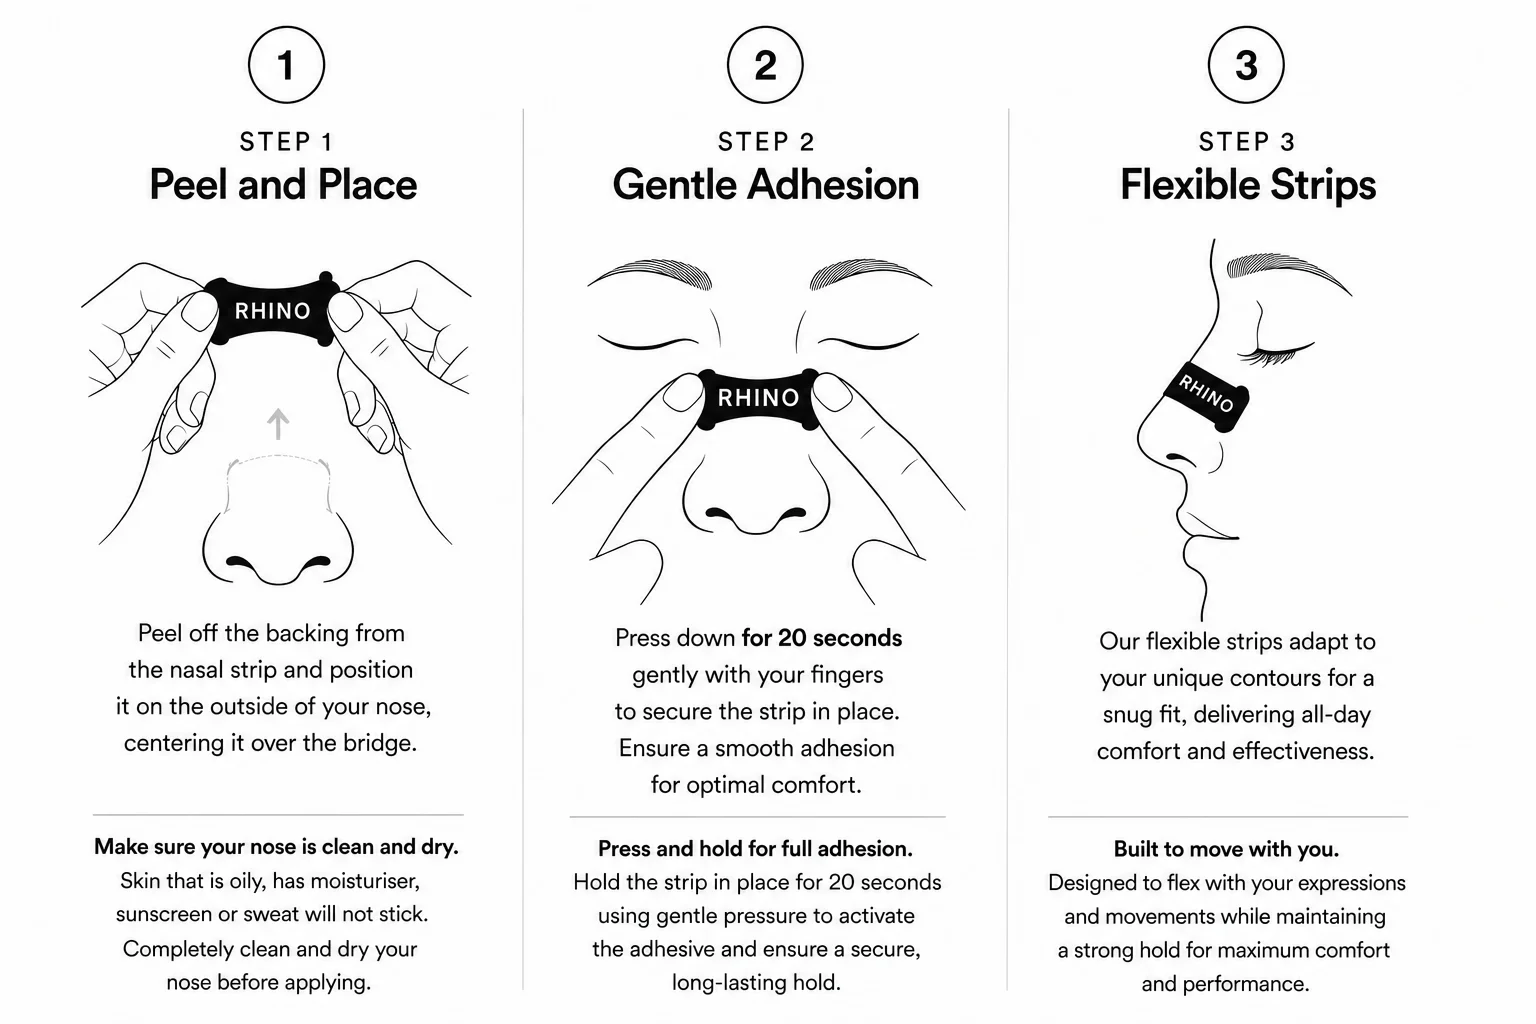
How to use nasal strips — the 6-step application.
Each step matters. Skipping any one of them — especially the prep — is the most common reason people don't get the result they expected.
Wash & dry thoroughly

Use a gentle, oil-free cleanser to remove all moisturiser, sunscreen, makeup and natural skin oils from the bridge and sides of your nose. Pat completely dry with a clean towel — even tiny amounts of moisture or oil will stop the adhesive bonding.
Pro tip: Skip moisturiser on the bridge of your nose for at least 30 minutes before applying.
Peel from the centre

Remove the strip from its backing by lifting from the centre, not the ends. This protects the spring-band shape and keeps the adhesive clean. Avoid touching the sticky underside with your fingers.
Pro tip: Hold the strip by the protective tabs on each end while you position it.
Position above the flare

Centre the strip across the bridge of your nose, just above where your nostrils start to flare. Both pads should sit on the soft, springy cartilage at the sides — not on the bony bridge or down on the nostrils themselves.
Pro tip: Look in a mirror — the strip should arc symmetrically across your nose.
Press & hold for 20 seconds
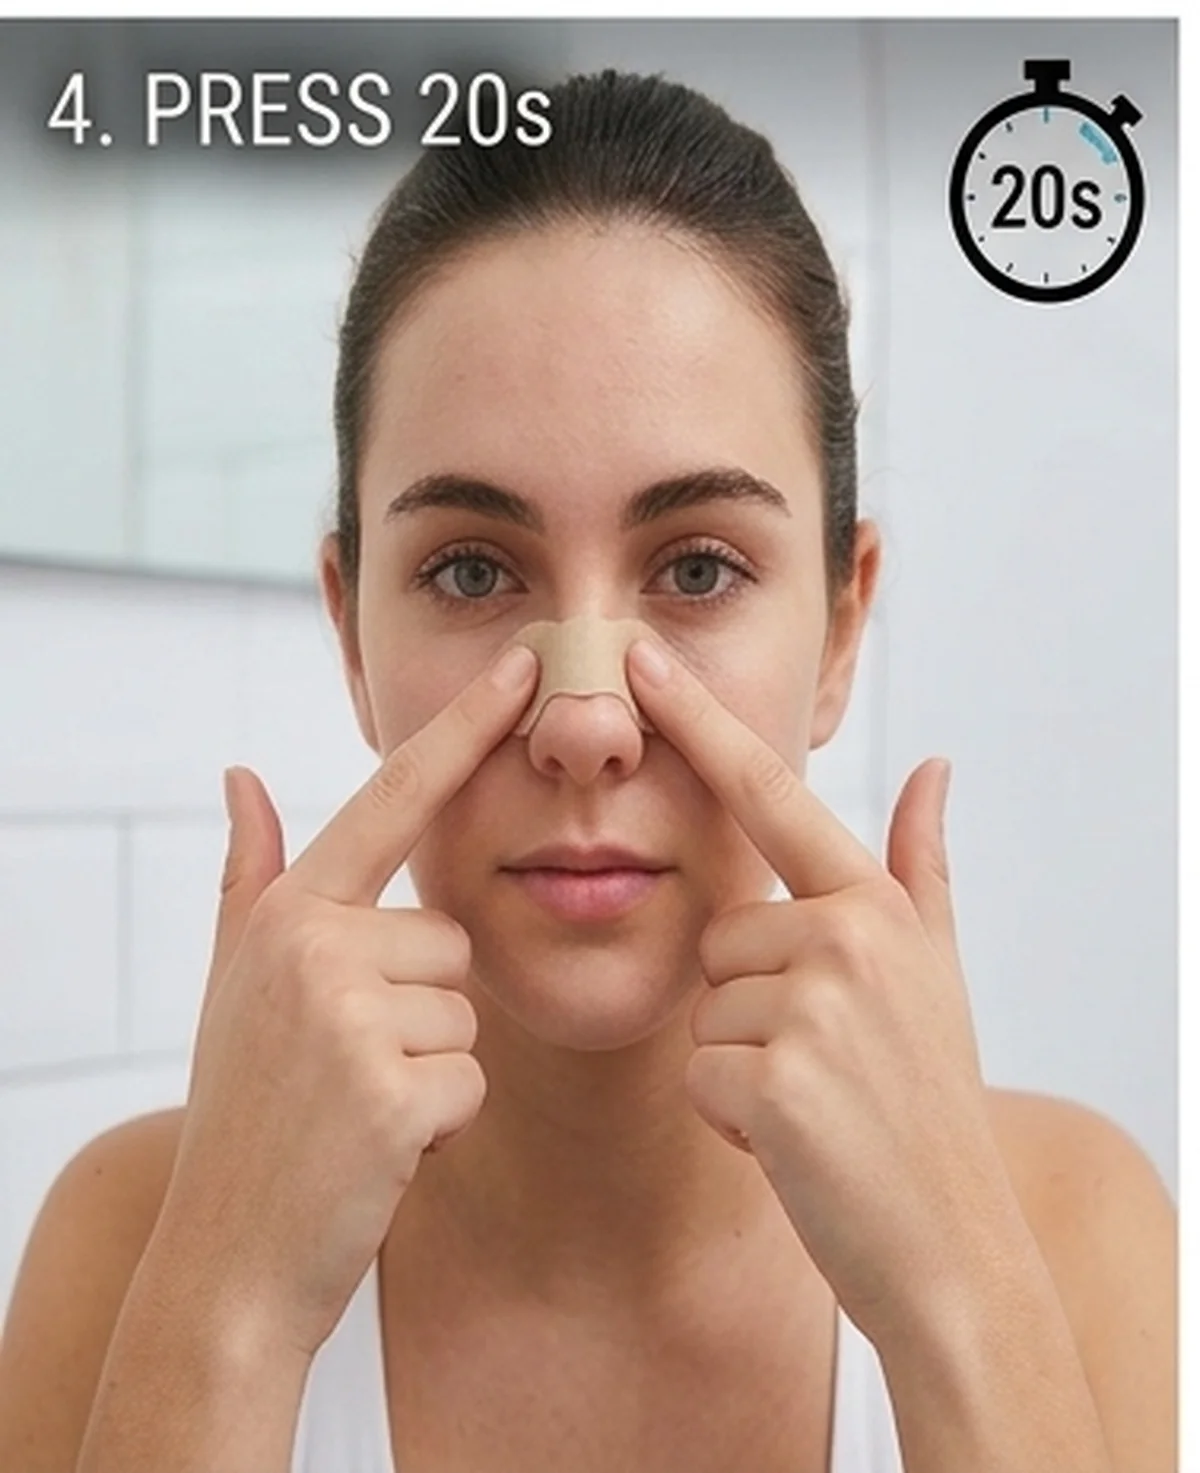
Press firmly down on each end for at least 20 full seconds, then run your fingertip along the whole strip. The warmth and pressure activate the adhesive — most stick failures happen because people skip this step.
Pro tip: Count out loud. 20 seconds feels longer than you think.
Sleep or train

You're ready. The spring-band gently lifts the sides of your nose for up to 12 hours. The strip is designed to flex with normal facial movement, so it should feel firm but never tight.
Pro tip: First-time users: try a daytime test run before sleeping in one.
Remove with warm water

In the morning, splash warm water on the strip in the shower for 15–20 seconds, then peel slowly from one end toward the other. Never rip it off dry — that's how people get redness.
Pro tip: If it still resists, leave a warm damp cloth on it for 30 seconds and try again.
Placement
Where to put nasal strips — placement diagram.
The spring-band only works when both pads are anchored on the soft side cartilage of your nose — not the bony bridge, not on the nostrils.
- Centred horizontally on the nose
- Pads sit on the soft side cartilage
- Sits above the flare of the nostrils
- Symmetrical arc across the bridge
- Too low — sitting on the nostrils
- Too high — on the bony bridge only
- Crooked or one-sided
- Pads not pressed down evenly
Other brands
How to apply Breathe Right & magnetic nasal strips.
The application method is the same for every breathing nasal strip — RhinoGear, Breathe Right and magnetic nose strips all rely on the same nasal-valve mechanism.
- Clean and dry the bridge of your nose — oil-free cleanser, no moisturiser, pat dry.
- Peel the Breathe Right strip from the centre of its backing to protect the spring band.
- Centre it above the nostril flare so the pads sit on the soft side cartilage — not the bony bridge.
- Press for 20 seconds so the adhesive bonds (magnetic strips: same — the magnets sit inside the pads).
- Remove in the morning with warm water to soften the adhesive, then peel slowly.
If you've found Breathe Right strips uncomfortable or they fall off overnight, our RhinoGear nasal strips use a softer hypoallergenic adhesive and a slightly stronger spring band.
Mouth tape
Applying gentle mouth tape.
RhinoGear Gentle Mouth Tape uses a vertical centre-strip design — your lips stay free at the corners so you can part them if needed.
Cleanse and dry your lips
Wipe lips and the skin around your mouth with a clean, dry tissue. Skip lip balm, gloss or oils within 30 minutes of applying.
Close your lips naturally
Keep your lips relaxed and gently closed — don't press them tight. The tape should secure, not squeeze.
Apply vertically over the centre
Place the tape vertically across the centre of your closed lips. The cut-out leaves the corners free so you can still part your lips if needed.
Press for 5 seconds
Press gently along the tape so it bonds evenly. You should be able to talk and yawn through it.
Remove gently in the morning
Peel slowly from one corner. If your skin feels dry, splash with warm water first.
Troubleshooting
Fix the most common issues.
Questions
Application FAQs.
Ready to put it into practice?
Grab a pack and follow the 6 steps tonight. Most customers feel the difference on night one.
Keep reading
Shop Nasal Strips
Drug-free, TGA-listed nasal strips for sleep and sport.
Snoring Solutions Guide
Find the right anti-snoring device for your snoring type.
60-Second Snoring Quiz
Find your snoring type and matched product in under a minute.
Do nasal strips actually work?
The evidence-based deep dive on what they fix and what they don't.
Nasal strip side effects
Skin irritation, long-term use, and who should avoid them.
Stop mouth breathing at night
Step-by-step protocol to retrain nasal-only sleep.
RhinoGear is included on the Australian Register of Therapeutic Goods (ARTG 508285). Always read the label and follow the directions for use. If symptoms persist, worsen, or you have any health concerns, talk to your healthcare professional.